How To Coach: Pitching #4

Hard
How to Coach: Pitching #4 is the fourth lesson in Dugout Captain’s series designed to teach pitching. This segment works to take the rules learned during sessions #1, 2, and 3… and apply them athletically into a pitching motion. Carefully review all areas of the pitching motion by working through a series of freeze drills. When appropriate, the focus will shift to two new measurables: Distance and Direction. As the video clearly outlines, there are five keywords that all athletes should be familiar with after concluding this segment:
- Balance – Position #1 which is the leg lift or balance point.
- Power – Position #2 which is the loaded, throwing position.
- Finish – Position #3 which is the follow through or finish.
- Distance – How far the athlete strides down the mound.
- Direction – Where the athlete lands.
**Coaches Note** Pitching instruction begins with Positions (#’s 1, 2, 3) and soon moves into Movements. You’ll hear two terms repeated frequently during Dugout Captain’s pitching instruction:
- 1 –> 2 = LOAD – The movement between positions #1 and #2, breaking from balance point and working into the power position. This is called the ‘load phase.
- 2 –> 3 = EXPLODE – The movement between positions #2 and #3, from power position through to finish. Many coaches refer to this as “pushing off.” So long as the body loads first, you can call this whatever you want!
Once the positions are understood and well-executed by the athlete, focus and instruction moves to the LOAD & EXPLODE actions taken. Power production starts and finishes with the legs, most specifically the back leg. Encourage the athlete to get physical. And then measure it!
EXECUTION – Follow these teaching segments and make reference to notes and coaching verbals:
- Live – Get ‘hot’ by throwing several fastballs at full speed with limited thought.
- Review / Positions #1 & #3 – Must prove ready to accept more instruction by demonstrating BOTH a solid leg lift and a fundamentally sound finish position. Review all positions.
- Review / Position #2 – Position #2 was covered last session, so cover it last during the review portion of the lesson. Start to focus on the feeling of the back leg and really driving off of the “loaded” power position.
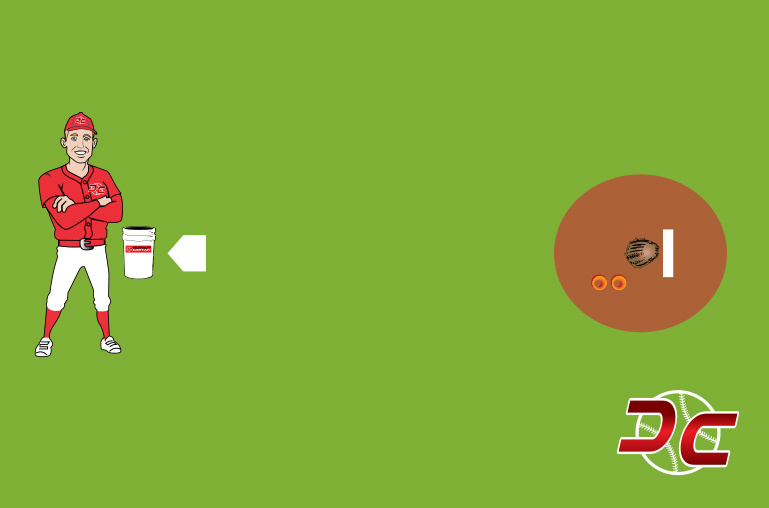
- Add Distance & Direction – Discuss the concept of Distance & Direction as measured by the front foot (landing foot). When ready to do this, simply request that the athlete hold a follow through or finish. Catch the pitch, jog up to the mound, and mark the front foot’s farthest point reached (the toe). This point becomes the objective measurable letting us know both Distance & Direction.
- Measure It – Mark the front of the stride foot with a cone or footprint into the dirt
- Distance – Have the athlete pace forward (heel-to-toe) from the pitching rubber to measure how far their current stride is. ( Goal: 5.5-6 athlete steps, roughly equal to athlete’s height. )
- Direction – Where has the athlete landed relative to a midline? Midline is drawn from middle of back foot, directly towards home plate. ( Goal: Land on or near the line. )
- Draw It – Erase the previous mark and establish the goal. Direction straight to target, at a distance equal to 5.5 of the athlete’s paces. Draw a T down the mound with the vertical portion represented by a midline (middle of back foot to home plate) and the horizontal portion drawn at the accurate distance.
4. No Stopping – Make aggressive pitches in an effort to apply instruction to a full delivery. Then compare it to the goal distance and direction.
Once into “No Stopping Reps”, place a marker or “Goal Cone” down at the athlete’s desired distance (5.5 steps). Expect some wild pitches as the athlete grows comfortable using the legs more and takes several pitches to extend the stride length. Use the concept of load first, then explode to engage the back leg and produce more power. Make sure that athletes finish this session without any sort of paralysis by analysis – don’t think, just throw it!
DC KEYS
- Throw Hard – Athletes may start to think too much when focus shifts to measurables such as distance and direction. Ensure that pitcher’s stay aggressive and review their measurables only AFTER unleashing a full fastball.
- 5.5 Steps – Stride length should be roughly equal to athlete height. Athlete height, on average, is 5.5 paces of their own feet. Try it, it works.
- 1-2-1-3 – Best homework drill ever! Up to balance point (#1) –> Out to loaded power position (#2) –> Back to balance point (#1) –> Aggressive throw and finish (#3). Difficult and advanced.
CLOSING – Individual Instruction takes over from here. Undoubtedly, beginning pitchers will need time to grow comfortable being explosive. Extending distance and adjusting direction can be challenging, so take appropriate time. Glove Arm, front side, head movement… they’re all coming. If you find yourself tinkering with these areas, might be time for a pitching instructor to take a look at your athlete!

EXECUTION KEYS
- GET HOT
- REVIEW #1 & #3
- REVIEW #2
- ADD NEW - DISTANCE & DIRECTION
- NO STOPPING
DC KEYS
- THROW HARD!
- 5.5 STEPS
- 1-2-1-3
EQUIPMENT LIST
 Baseball Buckets1
 Home Plate1
 Pitching Rubbers1
 BookPurchase